
All parts of the coconut tree, known as Kapruka, are removed from the field and used by human beings for their daily consumption. However, with our knowledge, the nutrients around the coconut tree will be available again, resulting in reduced yields, stunted growth, and increased incidence of diseases and pests.
Thus, in order to obtain a high and uniform yield, it is imperative to return the nutrients taken out from the coconut tree to the soil. Organic or chemical fertilizers can meet the nutrient requirements of the coconut tree.
Basically, using compost as a fertilizer, the following benefits could be achieved:
- Enhanced soil fertility due to increased activity of soil organisms.
- Improving the physical properties of the soil and reducing erosion.
- Successful plant growth and yield increase.
- Eco-friendly and useful for waste management
- Minimize the cost of fertilizer.
- Increased plant resistance to diseases and pests.
- Addition of nutrients to the soil is gradual and cyclical, so it is possible for the tree to stay in the nutrient soil for a long time and provide the nutrients in the soil evenly.
When applying compost as organic fertilizer to the coconut tree, the amount of nutrients required per plant per year should be considered. The amount to be applied is quite large as organic fertilizers contain low concentrations of key nutrients.
Basically, compost is the main type of organic fertilizer with commercial value. In compost production, plant parts and animal wastes are decomposed by microorganisms under controlled conditions. We can buy compost manure in the market but we cannot say the exact quality (N, P, K percentage). For this reason, it is best to use the waste from your backyard and home for compost production.
Coco-compost
The amount of nutrients in compost manure depends on the raw material used to prepare it. Therefore, the amount of compost to be used for coconut cultivation can be determined only after analyzing the nutrients in their contents.
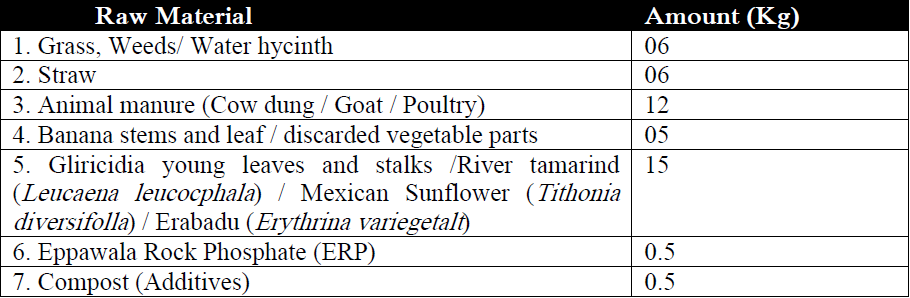
Special “Coco-Compost” has been introduced for coconut cultivation to solve these problems. The quantities of raw material required to prepare 30 kg of this cocoa-compost are given below.
Coco-compost can be produced in 2-3 months by using the raw material which can be found later. Using the raw material cut into small pieces helps to increase the efficiency of the system.
Pile method
There are several methods by which compost can be produced, and the easiest method for coco compost is the pile method. It can be used as a successful method due to its advantages such as quick decomposition, ease of Turning and Mixing.
Steps
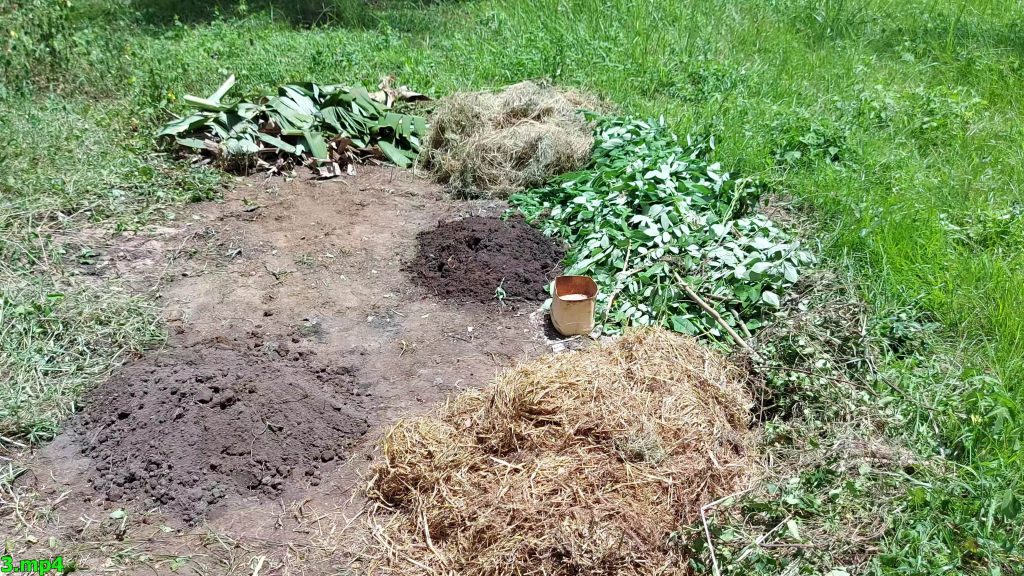
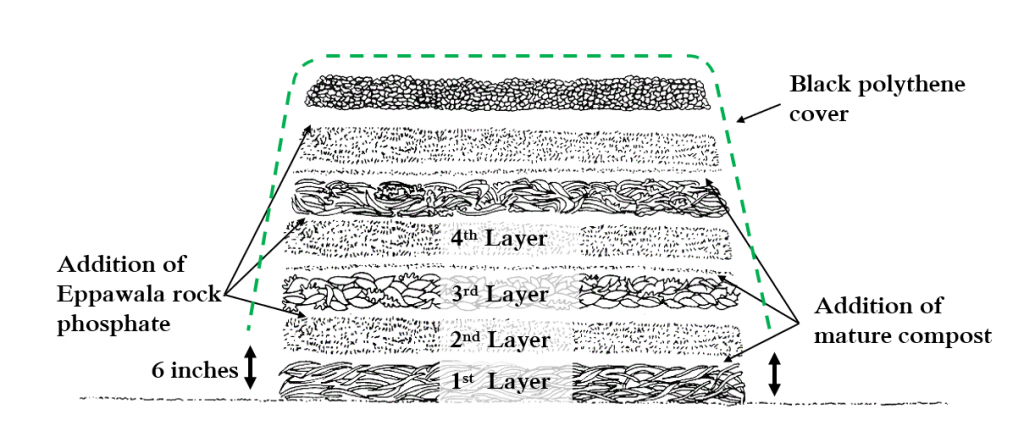
1. In compost production, the first step is to select a flat, slightly elevated area that is easy to obtain raw material and water.
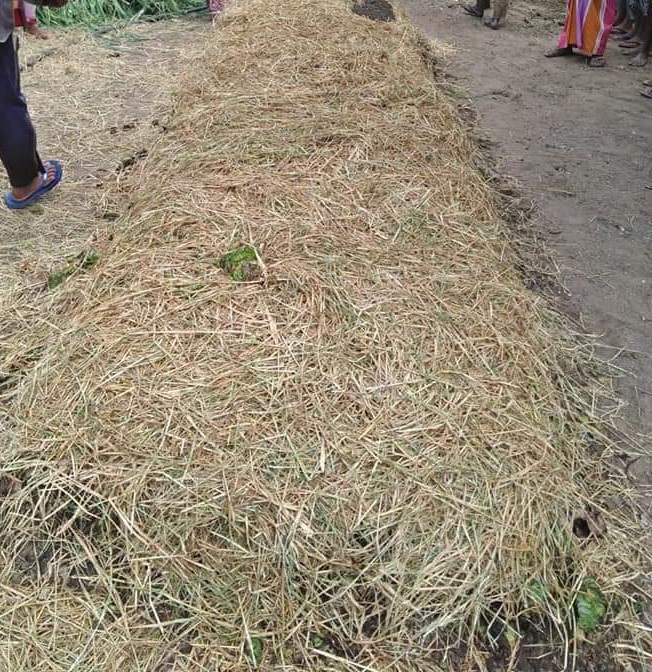
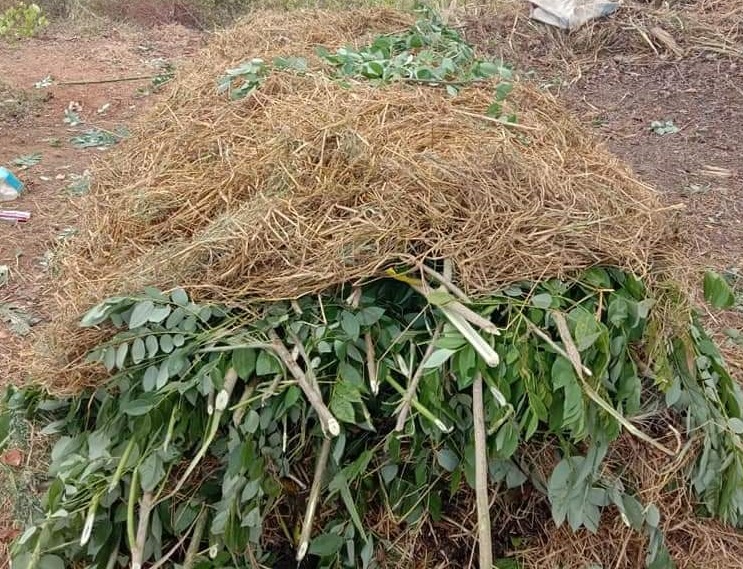
2. Then lay a layer of straw or coconut twigs on the ground and make the maximum width of the pile about 5 feet and the length to suit the size of the material provided.
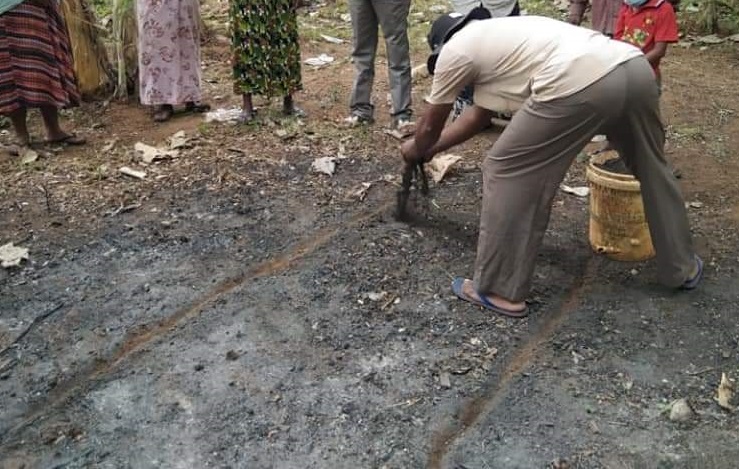
3. Animal manure is applied as the second layer. Sprinkle about 200 g of the (as additives) mature compost spread evenly all over the pile.
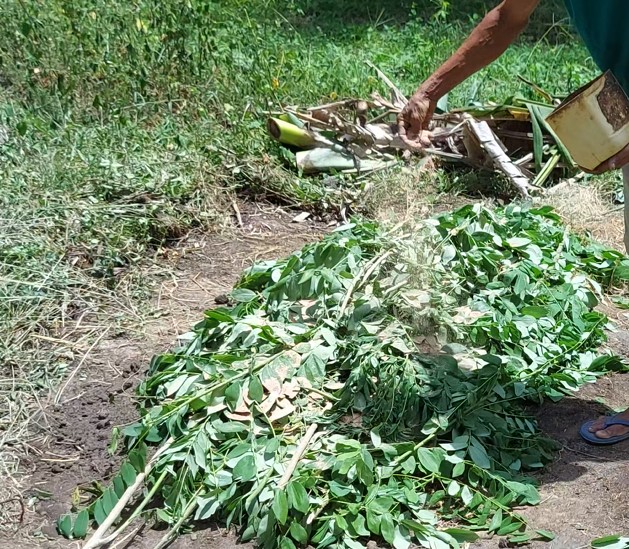
4. Plant parts should be used for the next layer after the second layer of animal manure. When applying leaves such as Gliricidia, the ripe stalks should be packed two to three inches out of the corner so that they are easy to remove at the first turning.
5. Next, rock phosphate should be sprayed on top of the plant layer. Eppawala rock phosphate is used to increase the percentage of phosphorus in the compost
6. In this way maintain the height of the pile according to the abundance of raw material. The compost pile should be designed in such a way that the plant parts are in two layers, interspersed with animal manure. It is essential to apply mature compost on the material which is difficult to decompose.
NB
* Moisture-containing parts decompose quickly, so easy-to-decompose materials and hard-to-decompose materials should be alternately layered.
* Once the compost pile is about 4 feet high, finish filling the pile.
7. Adequate water spraying (usually 2 liters) should be done as water is essential for microbial activity.
8. The prepared pile should be covered with black polythene as shown in the figure so that it can be ventilated. Polythene bags are used to reduce water leakage by evaporation. If ventilation is required to maintain the cover at least six inches above ground level, windows made of PVC pipes may also be used.

NB
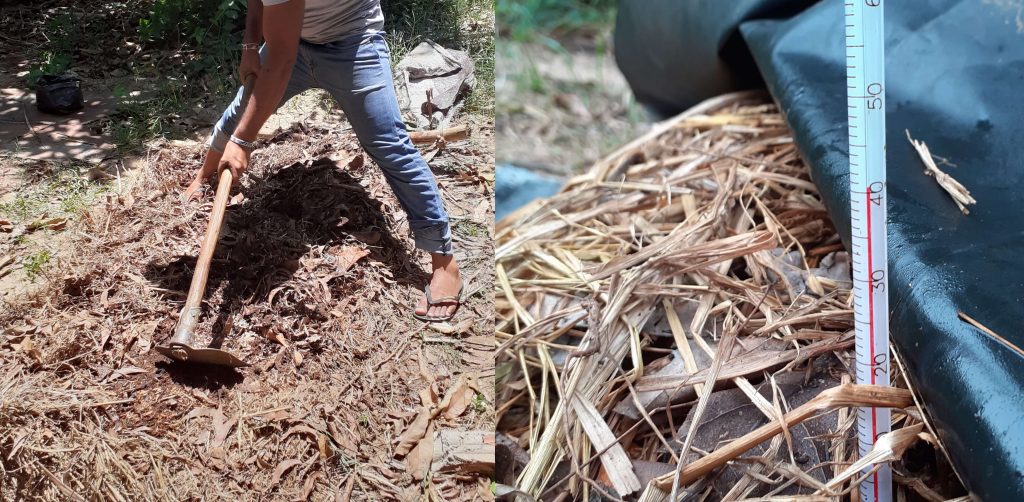
* Remove the polythene cloth every 6 to 7 days and check for moisture. If water droplets are squeezed by hand, it will contain more water and if it is dry and cold, water should be added immediately.
* In a dry zone, a moisture test should be done at least once in 2 days.
9. One and two months after preparation of the pile, turning and mixing of the compost pile must be done.
a. A month later – the first turning
b. Two months later – the second turning
– Apply about 300 grams of mature compost (as additive) here.
NB
* When checking the temperature of a properly prepared compost pile, you can see that the temperature is around 40oc after about 15 days.
10. By three months the compost you need is ready for use. Compost manure is black, brown, odorless and can be obtained in small or lump form.
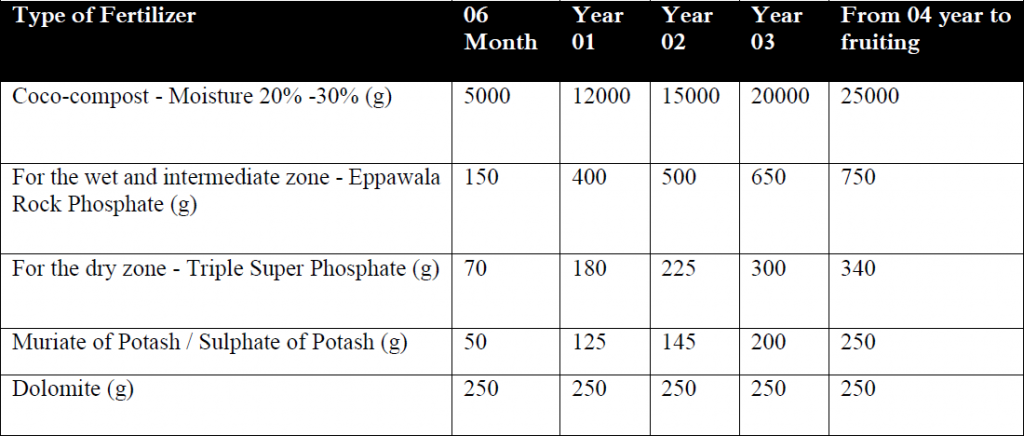
*When applying compost,
- Amounts of fertilizer required per year for coconut seedlings,.
2. Amounts of fertilizer required per year for fruit bearing coconut trees,

Leave a Reply